A dirty grill grate does more than look bad. Old carbon and grease cause food to stick, add a bitter taste, and feed flare ups that blacken the outside of a steak while the inside is still raw. A grate that is cleaned well, and kept seasoned if it is cast iron, cooks better, lasts longer and is easier to clean next time.
This guide covers the main grate materials and how each should be treated, the burn off, the different brush types and a safety risk with wire bristle brushes, scrapers, a deep clean method, how to re oil cast iron, and the burner and drip tray maintenance that keeps the whole grill safe. The advice follows common maintenance practice, and your grill's manual takes priority where it differs.
Grate materials and what they need
Cast iron grates hold heat well and give strong sear marks, and they are heavy. They rust if left bare and wet, so they need seasoning with oil, much like a cast iron pan. Treat them as you would a pan: clean when hot, dry, and oil lightly.
Porcelain coated grates, usually steel or cast iron under an enamel layer, resist rust and are easier to clean, because food sticks less to the glassy surface. The coating can chip, especially under a hard scraper or a metal brush used with force, and exposed metal beneath then rusts. Treat them gently, and avoid sharp metal tools.
Stainless steel grates resist rust and corrosion and are durable, though they do not retain heat as well as cast iron and can discolour with high heat. They tolerate brushes and scrapers well, and are the easiest material to clean aggressively. Chrome plated steel grates on cheap grills rust and flake over time, and are best replaced when the plating wears off.
| Grate material | Heat retention | Rust risk | Care |
|---|---|---|---|
| Cast iron | Excellent | High if bare | Clean hot, dry, oil lightly |
| Porcelain coated | Good | Low until chipped | Gentle tools, avoid chipping |
| Stainless steel | Moderate | Low | Tolerates brushes and scrapers |
| Chrome plated | Moderate | Rust once plating wears | Replace when flaking |
The burn off
The burn off is the simplest step. After cooking, close the lid and run the grill on high for ten to fifteen minutes. The heat turns food residue into ash, which is easier to brush away, and kills much of the bacteria on the grate. On a gas grill, turn all burners to high, and on charcoal, let the coals burn down with the lid on and the vents open.
Do the burn off after cooking, not before, so the next session starts with a grate that needs only a quick brush. A burn off before cooking is also common, to clean and heat the grate, but it does not replace cleaning after. Watch for flare ups while the grate is dirty, and keep the lid closed so the fire starves of oxygen if it flares. Never leave the grill unattended during a burn off. The ash left behind is easy to remove with a brush while the grate is still warm.
Brush types and the bristle risk
Wire bristle brushes are the traditional tool, and they are effective, but they carry a real hazard. Bristles can loosen with wear and heat, stick to the grate, and transfer to food. Swallowed bristles have caused injuries, which prompted warnings from medical sources and consumer groups, though no source documents how common it is. The safest approach is to treat bristle brushes as consumables, inspect the grate after brushing, and replace the brush at the first sign of loose or missing bristles.
Alternatives avoid the risk. Bristle free brushes use a coiled wire or a woven stainless steel mesh that cannot shed single wires. Nylon bristle brushes work on a cool grate, but melt on a hot one. Wooden scrapers, shaped to the grate bars, wear to fit the grate and cannot shed metal. Nylon or stainless scouring pads on a handle are another option. Grill stones, pumice blocks that scrub the grate, are effective on stubborn residue but crumble and leave grit, so wipe the grate afterwards.
A ball of crumpled aluminium foil held in tongs is a cheap, bristle free alternative that works on a hot grate. The foil is harmless and disposable. Whatever tool you choose, wipe the grate with a paper towel or a damp cloth after brushing to pick up any loose material. Check the grate by eye and by touch before cooking.
Scrapers and routine cleaning
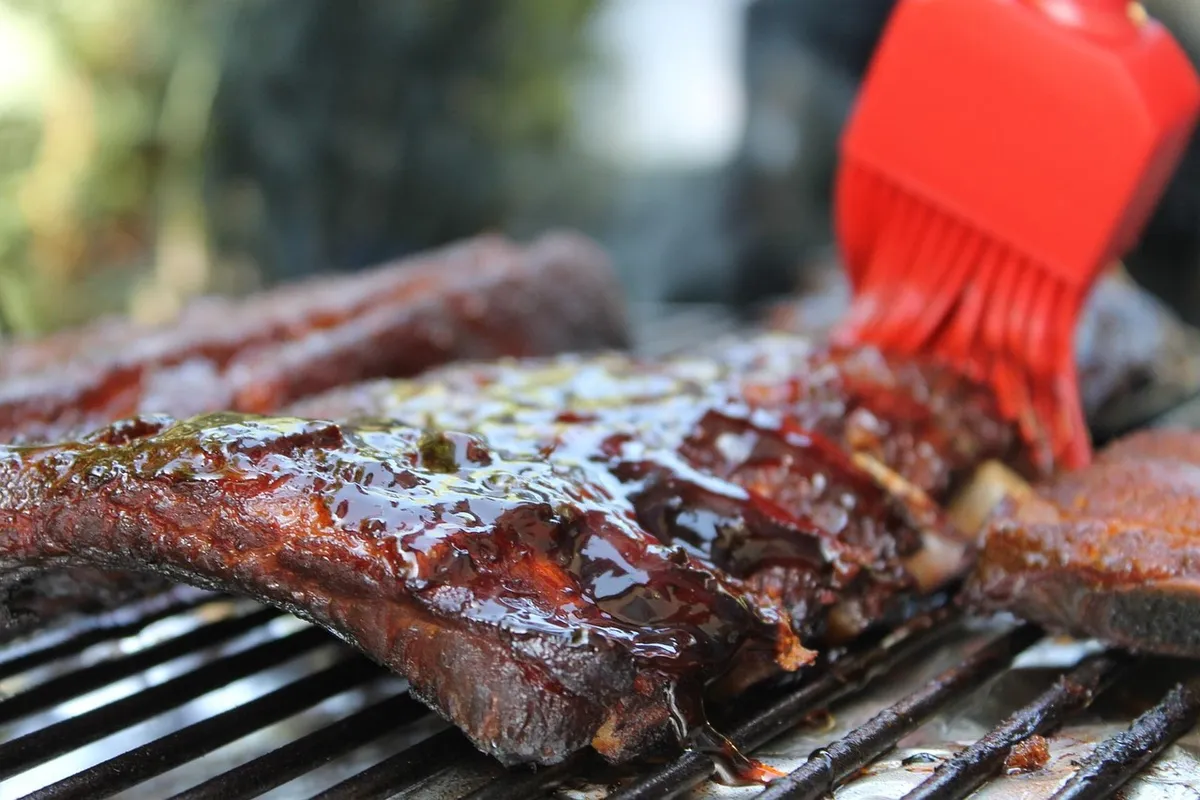
A scraper is the tool for stuck on residue. A flat metal scraper with a notched edge fits the bars and lifts carbon and cheese without much effort. On porcelain coated grates, use a wooden or nylon scraper to avoid chipping. On cast iron and stainless, a metal scraper works well.
Routine cleaning is brief: after cooking and a burn off, scrape and brush the grate while it is warm, then wipe it. A few minutes after each session prevents the build up that makes a deep clean such a chore. Clean the grate again before the next cook, a quick brush to remove ash and dust, since food sticks to dirt. Keep a dedicated set of tools near the grill so the job is easy, and store them dry.
Grease collects in the bottom of the grill, so scrape out the firebox every few cooks, and empty the drip tray. Hot grease is the cause of most grill fires, and a clean grill is a safer one. A grill cover keeps rain and dirt off between sessions. The material of the surroundings matters too, and our guide on outdoor furniture materials helps if grease splashes reach your patio set.
A deep clean
A few times a season, or when the grate is heavily built up, a deep clean resets the surface. For stainless and porcelain coated grates, remove the grate and soak it in a tub of hot water with dish soap for an hour or more, then scrub with a nylon pad or soft brush. For stubborn carbon, a paste of baking soda and water applied and left for an hour helps, and a cleaner formulated for grills is an option, following its instructions and rinsing well.
Cast iron grates should not soak for long, because water causes rust. Scrub them with a stiff brush and hot water, a little soap is fine, and dry them thoroughly and at once, ideally on a warm grill, then re oil. A steam clean is another method for gas grills: place a foil tray of water on the grates, close the lid and heat until the water steams, which softens residue so it wipes off. It is gentle and effective, but takes time.
Avoid oven cleaner on grates unless the maker states it is safe, as it can damage porcelain and leave chemical residue. Rinse any cleaner very thoroughly and burn off the grate before cooking. If a pressure washer is to be used on a removable grate, use a wide angle nozzle and keep a distance, as the coating can chip, and our pressure washer guide explains the settings.
Re-oiling cast iron
Cast iron relies on a seasoning layer, a thin, polymerised coat of oil that protects the metal and makes the surface less sticky. After cleaning and drying, apply a very thin film of high smoke point oil, such as vegetable, canola or grapeseed oil, with a paper towel, and wipe off the excess until the surface looks dry. Heat the grate on the grill for a few minutes, which bonds the oil to the iron.
Too much oil leaves a sticky, gummy surface, so less is better. Rust spots can be scrubbed off with steel wool, then the grate re seasoned. A grate that has lost its seasoning completely can be stripped and re seasoned in several coats, heated between each. Oil the grate before long storage, and keep it dry. Do the same for the grate before the first cook of the season.
Oil before cooking, too: a light wipe of oil on a hot grate helps stop food sticking, particularly fish and lean meats. Use tongs and a folded paper towel to apply it, never spraying aerosol oil onto a lit grill, which can flare.
Burner and drip tray maintenance
On a gas grill, the burners need attention too. Blocked burner ports cause uneven flames and hot and cold spots. Brush the burner tubes with a stiff nylon brush or a wire brush with the gas off and the burner cool, and clear the ports with a paperclip or a small pin. Check the venturi tubes, where the gas mixes with air, for spiders and debris, a common cause of weak flames, and clear them with a flexible brush.
The flavouriser bars or heat plates above the burners collect drippings and burn them, and they corrode over time. Scrape them clean and replace them when they are full of holes. The drip tray and grease cup catch fat, and should be emptied and wiped after every few uses, or lined with foil for easy changes. Hot grease in a full tray is a fire hazard.
Check the hoses and connections for cracks and leaks at the start of the season, brushing soapy water on joints to spot bubbles. Never use a grill with a gas leak. For comparisons between grill types and what each needs, see our gas versus charcoal comparison, and browse the Outdoor and Garden section for more.
Charcoal grills and other differences
Charcoal grates follow the same rules, with a few differences. Ash is the main extra job. Ash left in the bowl absorbs moisture, which promotes rust in the bowl and on the grate's underside, and it blocks airflow through the vents, which makes the fire harder to control. Empty the ash only when it is completely cold, which can take a day, and put it in a metal container, never a bin with other waste, because embers can stay live for many hours.
Charcoal fires leave a sooty film on the grate and the lid, and the lid can flake. The flakes are carbon, not paint, as many people fear, and they are harmless but unpleasant, so brush the underside of the lid with a stiff brush when it is cool. Wipe the interior with a damp cloth occasionally. The grate over charcoal sits closer to the heat, so burn off is quick, and a hot brush after the fire dies down is enough for routine cleaning.
Pellet and kamado style grills have their own routines, and the manual should be followed. Pellet grill grates are usually porcelain coated or stainless and need the same gentle brushing, while the fire pot and ash need regular emptying. Kamado grates are often cast iron or stainless and are cleaned the same way, with care not to crack ceramic parts with sudden temperature changes or cold water.
Common mistakes and non-obvious failures
The most common mistake is cleaning a cold grate. Residue hardens as it cools, and scraping a cold grate takes much more effort than a warm one. The second is a heavy handed scrubbing that chips porcelain, exposing steel that rusts from the inside, so a gentle tool on a coated grate protects its life. The third is soaking cast iron for hours, which invites rust that must then be removed and the grate re seasoned.
Less obvious failures include leaving a bristle brush outdoors, where rain and heat loosen the bristles, and storing tools on top of the grill, where heat damages them. Another is skipping the check of the grate after brushing, since a loose bristle on a bar can end up in a burger. A fourth is using too much cooking oil on a hot grate, which flares and leaves gummy deposits. A fifth is ignoring grease behind the control panel and in the corners of the firebox, where it builds up unseen and can ignite.
Finally, remember that cleaning products and food contact surfaces do not mix well. If you use a chemical cleaner, rinse the grate thoroughly, run a burn off for at least ten minutes and check there is no residue or odour before cooking. If in doubt, use hot water and a scrubber. These simple habits keep the grill safe and the food tasting of the food, not of the last cook out.
Seasonal routine and storage
At the start of the season, give the grill a full inspection before the first cook. Check the gas connections with soapy water, clear the burner ports, remove any spider webs from the venturi tubes, scrub the grates and replace anything rusted through. Run the grill on high for fifteen minutes to burn off dust and any storage residue, then oil cast iron grates and cook something simple to check that heat is even across the surface.
At the end of the season, do a deep clean while the grill is still warm from the last cook, since grease and carbon come off far more easily than after months of sitting. Empty the drip tray, scrape the firebox, brush the burners and wipe the exterior with warm soapy water. Oil cast iron grates and put them in a dry place, or leave them in the grill under a well fitting cover. Disconnect and store propane cylinders outdoors in an upright position, away from heat and ignition sources, following the supplier's safety guidance.
If a grill sits outdoors through winter, a breathable cover protects it from rain and snow without trapping condensation. Check it occasionally for damp, since a wet grate under a plastic sheet rusts quickly. Spiders and insects like to nest in burner tubes over winter, and covering the air intakes with fine mesh when not in use stops them. A short tidy up and a reliable routine mean the first barbecue of spring starts with a grill that is ready to cook.
Frequently asked questions
Should I clean the grate before or after cooking?
Both, ideally. A burn off and brush after cooking prevents build up, and a quick brush before the next cook removes dust and ash. Food sticks to dirt.
Are wire brushes safe?
They can shed bristles that stick to the grate and end up in food. Inspect after brushing, replace brushes at the first sign of wear, or choose a bristle free option.
Can I wash grill grates in the dishwasher?
Some stainless grates can go in, but heavy grease can clog the machine, and cast iron and porcelain should not. Check the manual and wash by hand if unsure.
How do I stop rust on cast iron grates?
Keep them seasoned, dry them after cleaning, oil them lightly and cover the grill. Scrub off rust spots with steel wool and re season.
How often should I deep clean?
A few times a season, or when build up resists a brush. Light users may need fewer, and heavy users more. Clean the drip tray and burners on a similar schedule.
The bottom line
Burn off after cooking, brush or scrape the grate while it is warm with a tool suited to its material, and wipe it clean. Prefer bristle free tools, or inspect carefully if you use wire brushes. Oil cast iron lightly after cleaning, and deep clean a few times a season.
Keep burners, ports and the drip tray clear, check the gas connections and cover the grill when not in use. A few minutes after each cook saves hours of scrubbing and makes food taste better.